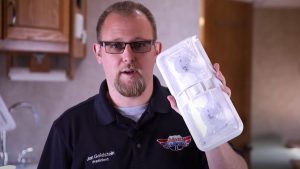
Upgrading to a single dome LED light fixture is a DIY enthusiast’s dream! This quick and easy install can be done with just a couple of tools.
- Screwdriver or screw gun
- Voltage Tester
That’s it! The Leisure LED light fixture comes with all the screws and wire nuts you need.
Quick tip: When you’re replacing RV parts, you may find that the originals were installed using square head screws. Manufacturers use them because they’re super quick and easy. It’s a good idea to have a square tip screwdriver on hand before starting any RV repair project.
The first step in this installation is to make sure the current light is working. It’s important to know if there’s an underlying repair needed before proceeding with the installation.
After taking off the fixture cover, remove the screws in each corner to disconnect the light fixture from the ceiling. Once the fixture is free, pull the wiring down from the hole in the ceiling.
Two wires are coming from the ceiling, one power, and one ground. Keeping the wires separate, remove the wire nuts (also known as twist-on wire connectors) and disconnect the existing fixture.
Nearly all the time in RV wiring, the white wire is the ground and the colored or black wire is the power. Looking at the back of the new Leisure LED single dome fixture there is a wiring diagram. For this tutorial, the diagram does not match the wires in the roof.
Now is the time to test the wires coming from the roof and see which wire is the power and which wire is the ground. Using a voltmeter, touch the red power wire to what is usually the power wire coming from the ceiling: the colored wire.
Touch the ground wire on the voltmeter to what is usually the ground in RV wiring: the white wire. If the wires have been correctly identified the reading on the voltmeter will be positive.
In this case, the reading is negative. That shows that in this RV light, the white wire is the power and the colored wire is the ground.
Another way to test the wires is to hook them up.
If the light doesn’t work, switch the wires. Having a voltmeter handy is a quick and easy way to avoid having to do the work twice.
For this new single dome LED light fixture, the red wire is power and the black is ground. Hook the red wire to the power wire from the ceiling (in this case the white wire) and the black wire to the ground (in this case the green wire).
Secure the connection with the included wire nuts. This is a good time to test the light to make sure the connections are correct and secure. Simply flip the switch and make sure the light comes on. The wiring is now ready to be moved back up into the ceiling.
Align the new fixture with the existing holes and attach it to the ceiling using the provided screws. The new lens has a protective plastic film that needs to be removed, and then it’s ready to be put in place.
Slide the lens in one side, squeeze it and it will pop into place. Test the light again to be sure it’s working and you’re all set. That’s all it takes to upgrade to a single dome LED fixture.
Order the LED single dome light fixture at our Leisure RV Parts Store and make this quick RV upgrade yourself or come on in and we’re happy to help.


