Leisure LED Double Dome LED Light Fixture Installment
This RV light fixture install is quick and easy. The Leisure double dome LED light has 24 chips per side and gives off 550 lumens of cool white light.
With a slim profile, this light is perfect for installing under shelves or cupboards. We want to show you how we install this versatile RV light fixture as a replacement.
RV Light Fixture Install – Wiring
The most important part of replacing a light fixture is the wiring. Since this is a replacement fixture, the wires are already in place. After removing the old fixture, you’ll have two exposed wires.
The first step is establishing which wire is the power and which is the ground. Our wires here are black and white, and in most cases, the white wire is the ground. The power wire can be black or some other color.
We test this to make sure with a voltmeter. Using the voltmeter is easy. Red is positive and black is negative. We put the red side up to the black wire coming from the hole in the cabinet and the black side to the white wire. If the reading is a positive number we know that the red has identified the live wire.
Our Leisure LED fixture wires are red for the power and black for the ground. We twist the like wires together and cap them off with a wire nut (a twist-on wire connector).
RV Light Fixture Install – Testing and Mounting
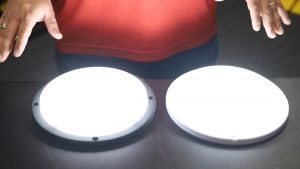
Once the wiring is completed, it’s a good idea to test the double dome light fixture and make sure that all functions are working properly. This RV light fixture has a two-way switch. The light can be used with just one side on, or with both sides on for brighter lighting.
Before securing the fixture, test the switch in both positions to check that everything is working as expected.
Every Leisure light fixture comes complete with mounting hardware.
Securing the double dome LED light to the underside of the cabinet is simple. Every Leisure light fixture comes complete with mounting hardware. For this model, the hardware includes the wire nuts used to secure the power connection and four screws.
Once again, this is a replacement fixture so there are already holes in the underside of the cabinet. Fortunately for us, we’re replacing a fixture of the same dimensions so we can line up the holes. After that, it’s a simple matter of placing and tightening the four screws.
The new LED light has a piece of film over each bulb cover that needs to be removed before securing them into the fixture. Once that’s done, the covers have tabs on the outer edge that get placed first. Then squeeze the cover, raise it, and pop it into place.
Test the light and the RV light fixture install is complete.
An Easy Install
This Leisure LED RV light fixture is very versatile. It has a slim profile and works in two ways to provide the perfect amount of light needed. Ease of installation makes it a natural replacement for your RV, motorhome, trailer, or coach interior lighting.
Replacement bulbs are available for Leisure LED light fixtures. These fixtures are built to last for 60,000 hours so you may be ready for something new by the time they need replacing, but a new bulb is easy to install for just a few dollars.
This video shows you how we do an RV light fixture install at Leisure Coachworks. Contact us with questions about your RV lighting needs or any other questions about RV repair, maintenance, upgrades, or renovations.