How to Winterize an RV
Glorious fall days make for some of the best RVing of the year. The beautiful changing leaves, crisp nights, and sunny days make autumn a prime time to visit the great outdoors in your camper or motorhome.
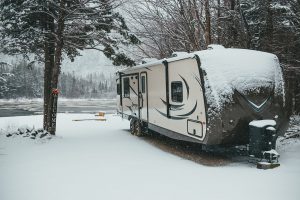
These days are also a signal that it’s time to get your coach or travel trailer ready for the winter.
Winterizing an RV is an important part of RV life.
It’s easy to imagine just parking your RV and hopping back in on the first nice spring weekend, but that’s a road to nasty surprises. Let’s take a look at some of the areas of your RV that need attention before you store it for the winter.
Do You Need to Winterize Your RV?
No matter what the weather is usually like where you live, a stored RV needs to be winterized. Just how much winterizing you need depends on your RV and your storage.
Some RVs are designed to be used all year long, even in cold weather. They have special insulation and heaters to protect against those cold temperatures. If this is your RV and you plan to use it year-round, it will require less vigilant winterizing.
The level of RV winterization you need also depends on where you plan to store your RV. Heated indoor storage is less complicated than outdoor storage.
Always check your owner’s manual for winterizing tips and instructions for your specific RV configuration.
Winterizing an RV
There are multiple areas of your RV that need attention during the winterization process. Knowing your RV and storage location, you should plan for the ones you need to prevent unpleasant spring surprises.
There are a lot of potential steps to winterizing an RV. If you’re new to RVing, ask a professional for help the first time you winterize.
Pipes
A major part of winterizing an RV is protecting your water pipes. You need to make sure that you drain all of your water pipes and tanks and fill them with anti-freeze.
Basic Steps in Winterizing RV Pipes
Drain your tanks and pipes
Drain all of your water tanks, including black and grey water tanks. Water in these tanks can freeze and bacteria can build up in black and grey water tanks that haven’t been drained and flushed.
Be careful when draining your hot water tank. Make sure the heater is off and the water is completely cool and not under pressure before draining.
Drain all of your RV pipes by running faucets and showers and flushing toilets. Open low-point drain lines to make sure the water is all out.
You can use an air compressor to blow air through your RV pipes to make sure the water is all out if you choose.
Bypass your water heater
You need to bypass your RV water heater to avoid filling this tank with anti-freeze. Some RVs have an integrated bypass system that you can activate by turning a valve; others will need to have one installed.
Without this bypass, you’ll fill the water heater with anti-freeze before it gets to the pipes, which wastes anti-freeze.
Fill your pipes with non-toxic RV anti-freeze
Finally, fill your pipes with special, non-toxic RV anti-freeze using a water pump converter. DO NOT use regular automotive anti-freeze. It’s toxic. Remember that you’re filling every water line with the stuff, so go to an RV store and make sure you get the appropriate product.
Pour anti-freeze into drains and toilets
A little more anti-freeze in these areas fills the traps and helps keep them safe from freezing.
Check Your Work
Once you’ve finished, make sure your water heater is off and any faucets or drains are closed. You want to keep that anti-freeze in the system through the winter.
RV refrigerators, ice makers, dishwashers, and water filters pose more complicated issues when it comes to winterizing. Check your RV owner’s manual or consult a professional.
Never hesitate to ask for help with any RV project, especially one that can affect every single waterway in your coach. Contact Leisure Coachworks and talk to a professional before you decide that this is a DIY project.
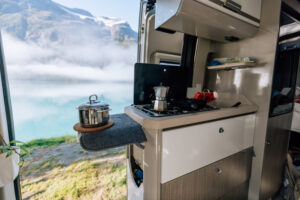
Interior RV Winterization
Even without any heat running, an RV stored outside is going to be very attractive as a safe haven over the winter for rodents and other critters. Those critters can do a lot of damage to your RV interior so it’s best to make sure they find shelter elsewhere.
Use steel wool to block any holes they may use to enter. Mice and other rodents have a hard time making their way through this material and it is an excellent filler for small holes and gaps.
You might also want to consider a fiberglass spray for any areas you think might be vulnerable.
Beware that some of these sprays contain pesticides.
Set some traps for the wayward mouse that makes its way into your RV. Make sure you’re not attracting critters by removing all food and giving your interior a thorough cleaning to remove any trace of delicious crumbs they might like.
Opening your fridge and cabinet doors helps avoid mold and any funky smells that might build up while your RV is stored. It’s also an excellent way to make sure you’ve cleared out clothes, food, and any other gear.
Turn off utilities, appliances, and electronics. This is a good time to inspect everything, checking for wear or corrosion. Remove your batteries and propane tanks and store them safely in a climate-controlled environment.
Exterior RV Winterization
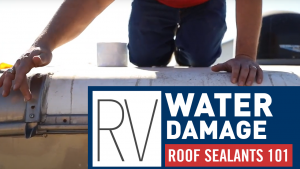
We’ve talked before about doing regular roof checks. Getting your RV ready for storage is a good time to do a thorough inspection of your roof and seals, check for leaks, and do any necessary repairs.
Cover exterior ports (furnace vents, exhaust pipes, etc.) with screening to prevent critters from entering. Clean and thoroughly dry your awnings and consider using a natural pest repellent around doors and windows for extra critter protection.
A good clean and wax is also a helpful step in winterizing an RV.
It gets rid of grime and the wax helps protect the exterior from the weather during storage.
Storing Your RV for the Winter
Choosing storage is part of winterizing an RV. Covered storage protects your camper or motorhome from damaging weather. It’s the best choice if available and within your budget.
If you’re storing your RV outside, invest in a breathable cover to protect it while allowing airflow and preventing moisture build-up.
Try to park on gravel or concrete, use wheel chocks, and elevate your RV if possible to avoid tire damage.
Winterizing an RV Saves Money
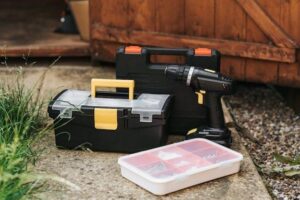
Winterizing an RV seems like a daunting project, but you can do much of it yourself at no cost. Taking care of the water pipes might require some help from a professional, particularly the first time you do it.
Whether you decide that winterizing an RV is a DIY project or one for a professional, it’s not expensive and can save you thousands of dollars on repairs in the spring.
Every RV that is going to be stored needs some level of winterizing.
Check your owner’s manual to learn the specifics about your RV and get started protecting your investment.
Never be afraid to ask for help. Contact the professionals at Leisure Coachworks and we’ll help you figure out the proper steps for your coach or trailer, your RV lifestyle, and your budget.