How to Prepare Your RV for Summer Travel – All You Need to Know
Road Trip Ready: The Ultimate RV Summer Preparation Guide
RVing is all about adventure. When the weather warms up, there’s no better feeling than hitting the open road in your home away from home on wheels. Before you take off on your summer RV adventure, make sure your recreational vehicle is ready to take you places in comfort and safety.
This comprehensive guide will walk you through everything you need to do to get your RV primed for a lifetime trip across this great country’s beautiful summer landscapes.
A Quick Note on RV Classes
Motorhomes typically fall into three main categories:
Class A RVs are the roomiest option out there. These bus-sized beasts offer superior comfort on the road, so prepping them for travel does take a bit more time due to their size.
Class B RVs are the smallest and most nimble. Based on a van frame, they provide ample living space. Yet they retain the ability to park and drive easily. Less RV prep work is needed overall for these convenient road trippers.
Class C RVs land in between sizes.
Most of the prep tips in this guide will apply to all classes but should be adjusted to your individual RV’s needs.
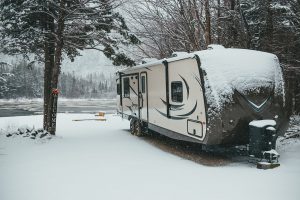
Take Your RV Out of Storage
After a long winter, it feels incredible to unwrap your home on wheels and welcome back warmer sunny days, perfect for traveling. Some RVs sit in storage over the colder months. Others may just have a simple tarp to protect them from the elements. Either way, it’s time to see what we’re working with.
In most cases, dust and grime will accumulate on the exterior surfaces after an RV sits for an extended time. It’s the perfect opportunity to give your RV a thorough wash down and wax. Start from the top and systematically work your way down using RV-friendly cleaners and soap solutions. Don’t forget to scrub the roof. You can then rinse debris with a hose or power washer.
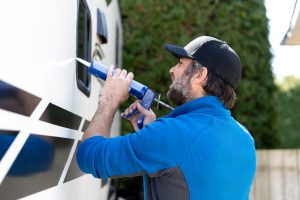
While you’re at it, inspect crucial roof components for any cracks, missing seals, or caulking that may have occurred over the winter. Make any needed repairs immediately to prevent costly water damage down the road. An ounce of prevention is worth a pound of cure.
Hitting the road with a shiny, sealed-up exterior gives your trip a great kickstart.
Check Those Tires
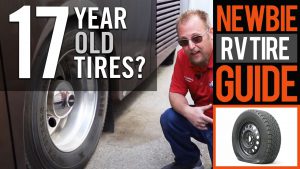
After sitting idle all winter, tire pressure inevitably drops due to the cooler air temperatures. It’s basic science – the colder the molecules in the air trapped inside, the slower they get, taking up less overall space. The result? Lower PSI.
Before loading up your rig:
1. Check all tires with a pressure gauge.
2. Inflate them to the vehicle manufacturer’s recommended level. You may find it stamped on the sidewall or listed in your owner’s manual.
3. While you’re down there, do a visible inspection on the tread and sidewalls. Look for any bulges, cracks, damage, or uneven wear. If the tread looks questionable, replacing worn tires before heading out is a good call.
You should also check that your spare tire is properly inflated and in good shape.
No one wants to deal with a blowout in the middle of nowhere.
While prepping the tires, don’t forget to think of whether it’s time to rotate them, especially if you’ve put significant mileage on since the last rotation. Most experts recommend rotating every 6,000 to 8,000 miles.
Test the Batteries
Batteries and inverters are the lifeblood of an RV. When not hooked up to external power, they power everything from LED lights to appliances. Typically, RVs have more than one dedicated deep-cycle battery installed to meet higher energy demands.
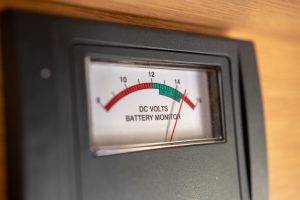
Like the tires, batteries sitting unused for an extended time can lose around 10% of their charge monthly. We recommend using a voltmeter or multimeter to test the charge level on all batteries. If any of them read under 12.4 volts, bring them up to a full charge using a quality RV battery charger.
While testing, check the physical battery terminals and connections for any corrosion. Clean if needed to ensure proper energy flow. Doing so will prevent issues down the line. In the event you discover damaged batteries, they should naturally be replaced. Also, confirm batteries are properly secured to withstand inevitable bumps and bounce on uneven terrain.
On average, RV batteries last around 5-7 years under regular use. If your current batteries are nearing that lifespan, it’s wise to invest in new ones before your trip, even if they still hold a charge.
Follow up With Engine and Generator
You won’t get very far without a working engine and generator. When taking your motorhome out of storage, start the engine, let it run for a few minutes, and check for any concerning noises. Mind the dash for any error codes as well.
With the engine warmed up, check all fluid levels, including
- Engine oil
- Transmission fluid
- Brake fluid
- Power steering fluid
- Coolant
- Windshield washer fluid.
If your RV has a built-in generator, go ahead and start it up. Verify it’s running correctly, producing clean power output. Change engine and generator oil if they are due based on mileage/hours to keep things lubricated and prevent wear and tear.
The owner’s manual will list specific fluid change intervals. But a general rule of thumb is to change engine oil every 5,000 miles or six months and generator oil every 100-200 hours.
Flush the Water System

We often take access to fresh, clean water for granted at home. But life on the road means your water supply is limited to whatever your RV can carry (or access via hookups.) To ensure your water system is as pure as possible, thorough flushing and sanitization are in order pre-season.
Many RVers winterize their water systems when storing their rigs during colder months. This process involves purging all water from tanks and pipes and then filling them with RV antifreeze to prevent damage. If you winterize, the first step is flushing this toxic antifreeze out of the entire system using an RV flushing wand attachment.
Run gallons of fresh water through, optionally with 1/4 part bleach. Then, check the valves and faucets for any remaining traces of pink fluid until the water runs clear. Even if you didn’t formally winterize, it’s still wise to thoroughly drain and flush your rig’s fresh water tank before filling.
Black and Gray Water Tanks
While fresh water capacity gets most of the attention, properly maintaining waste tanks is equally important for an RV. There are two waste tanks in trailers – black and gray. Black holds sewage from the toilet. And gray catches drain water from sinks, showers, and appliances. Both require proper RV summer preparation before hitting the road.
Look for Leaks
On the topic of tanks, one critical pre-departure check is leak detection. Crawl under your rig and thoroughly inspect all tanks, pipes, valves, and connections. Look for signs of cracks or deterioration that could lead to messy leaks. Also, search the interior and exterior for any dripping faucets. Water-stained areas around fixtures are another potential indication of pinhole leaks in supply lines.
Even minor ones can lead to significant headaches like destroyed interior finishes (or, even worse, mold) if left unchecked. See our article on leaks to learn what to do if you have a fresh tank leak.
Inspect All Appliances

Appliances are what make an RV genuinely feel like home. Getting them prepped is essential so you can live comfortably on the road. Here are the main ones to consider:
Air Conditioning
Scorching summer heat and humidity can transform your RV into an oven fast. Trust us, you’ll want a functioning air conditioner on board for road trip comfort during warmer months. Learn more about beating the heat in an RV here.
Before departure, clean washable filters or swap in new replacements to allow for proper airflow. Doing so also prevents straining the AC unit. Carefully inspect from all angles, looking for bent fins or obstructions around vents that could hamper cooling efficiency.
Check window seals around AC openings, ensuring any gaps or cracks are resealed to prevent infiltration of hot outside air. Finally, listen closely to the compressor and fan operation when testing, making sure you don’t hear any concerning rattle noises.
Microwave/Fridge
It’s almost impossible to imagine an RV living without a proper microwave and refrigerator. Before departure, thoroughly wipe down the interior of the microwave to eliminate any buildup. That means all the grease or food debris accumulations from last season’s adventures. Test heating functions at various power levels.
As for the fridge, clear out any old expired food leftovers and give it a deep clean as well. Check door seals for any cracking or signs of wear, then test cooling performance. Have it professionally serviced if the fridge struggles to maintain proper temperatures or the compressor seems to constantly run.
Stove and Oven
Before firing them up, perform a quick leak check by spraying stove pipe joints with soapy water. During this step, you’ll want to look carefully for bubble formation. Tighten any leaky fittings with an adjustable wrench, or have them replaced if cracked or severely corroded.
Next, verify that the burner igniters are sparking properly. Oven pilots should be igniting appropriately before flipping the control knob. Please always refer to manufacturer guidelines for proper leak testing procedures to prevent the risk of fire or explosion.
Propane
Many RV appliances run off propane, including stoves, ovens, furnaces, and hot water heaters. Propane is highly flammable. As such, special care should be taken when handling tanks and connections. Before departure, visually inspect propane cylinders for any dings, rust, or signs of damage that warrant tank replacement.
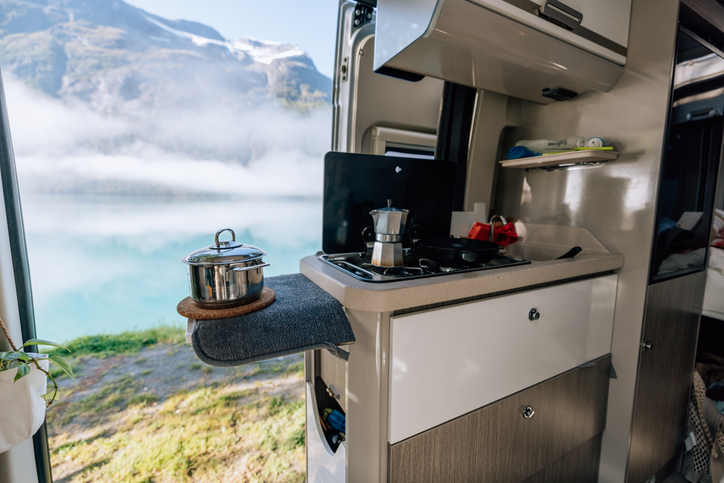
Declutter/Clean the Interior
While prepping appliances and systems, don’t neglect the RV interior living space. After all, that’s where you’ll be spending most of your time!
Start by decluttering all storage cabinets, overhead compartments, drawers, and other areas. Sort through items, removing any unnecessary equipment not essential for your upcoming adventure to free up space and eliminate unneeded weight.
Remember: lighter weight means better MPG.

Once emptied, systematically work through the entire interior. Give all surfaces a thorough scrub down. Pay special attention to food prep areas, as these are places prone to grime accumulation.
Use RV-appropriate, antimicrobial cleaners, and don’t forget window treatments when sanitizing. Air things out, then consider professional interior wash and carpet cleaning.
Be Ready for Emergencies
Taking a recreational vehicle out on the open roads means preparing your RV for the summer but also for the unexpected. Despite the best-laid plans, things can and do go wrong at times. There can be minor mishaps or more concerning safety issues. In any case, it’s best to equip your RV to handle emergencies confidently.
Smoke Alarms and Fire Extinguishers
Inside an RV, fire spreads rapidly and can trap occupants in a terrifying life-or-death scenario. Make sure all smoke detectors are correctly positioned and operational with fresh batteries. Test alarms monthly by pressing test buttons and replace any failing to respond correctly. Keep in mind that smoke alarms do wear out over time. Most should be replaced every 8-10 years or per individual manufacturer specifications.
Also, confirm you have ready access to a properly charged fire extinguisher suitable for motorhomes. Class B and C extinguishers designed for fuel, electrical, and gas fires typically encountered in RVs are your best bet.
First Aid Kit
Injury can strike anytime when boondocking off the grid or enjoying outdoor adventures away from medical facilities. Ensure your RV has a well-stocked first aid kit stored in an easily accessible location.
Include:
- Bandages
- Wraps
- Gauze pads
- Wound packing strips
- Antiseptic ointments and creams
- OTC meds like anti-inflammatories, antihistamines, and decongestants
- Any personal medications like inhalers, epi-pens or glucometers
Emergency Supplies
Travel-ready RVs should contain emergency supply bags for handling unexpected issues encountered out on the open road. Start with these essential RV tools:
- Reliable bright flashlights
- Spare batteries
- Glow sticks
- Backup power sources like hand cranks or solar-powered chargers
- Roadside warning devices like reflective triangles or flares
- Jumper cables
- Spare fuses/lightbulbs
- Essential toolkit containing pliers, screwdrivers, wrenches, utility knife, and duct tape.
Final Tip: Treat Your RV to Upgrades
That was our complete checklist to fully prep your home on wheels for memorable summer adventures on the open road. But why stop there? At Leisure Coachworks, we believe RVs shouldn’t just be road-ready – they should be fun-ready!
With essential maintenance checks complete, consider taking things up a notch by upgrading your rig with exciting new amenities to maximize enjoyment mile after mile. Swap drab carpet for sleek modern vinyl floors. Install a convenient exterior kitchen for scenic outdoor cooking. Or mount a flat-screen TV and premium soundbar for movie nights under the stars.
The only limit is your imagination (and budget, of course). The specialized technicians at Leisure Coachworks handle RV remodels and upgrades to transform basic vehicles into luxury land yachts on wheels.
Contact us today to explore exciting RV enhancement possibilities.