Design Your RV Layout Like A Pro | Cigar Lounge Conversion Video Ep. 3
This terrific project is turning a 1989 Airstream 370LE into a mobile cigar lounge. Check out how the Leisure Coachworks team designs an RV layout and get tips for your next DIY project.
The first step in designing an RV bus conversion interior is old-fashioned graph paper.
That’s right, putting pencil to paper and sketching the space.
Each cell represents one square foot. This gives the first estimate of how the desired elements fit into the usable space.
Keeping the process low tech allows the design team, and the customer, to get a real feel for the end product. The next step is taking some tape and marking out the design on the RV floor.
With the general design mapped out, it’s time to start building.
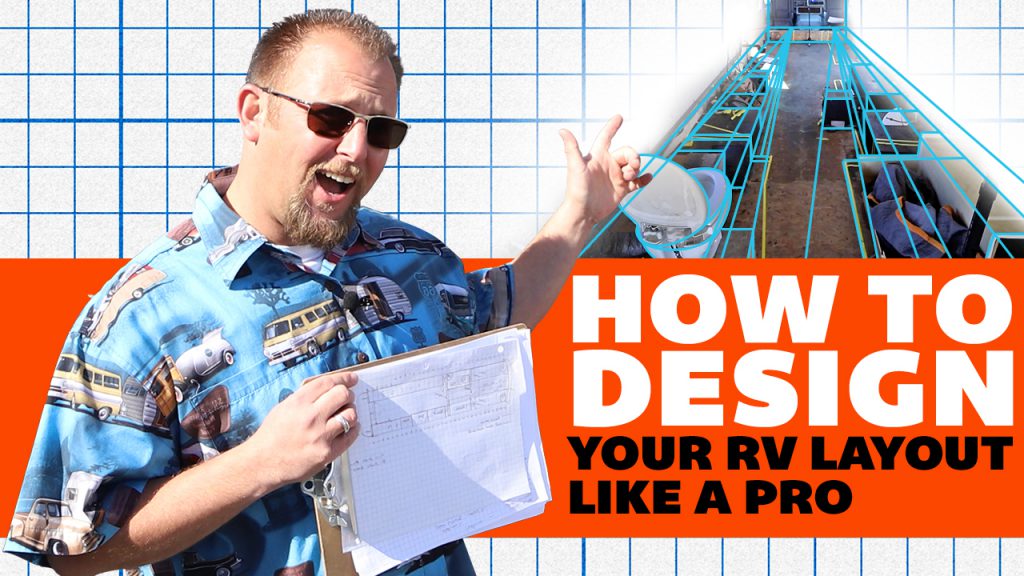
Using 1×1 and 1×2 boards, our skilled craftsmen make a physical mockup of the design that started on a piece of graph paper.
For this RV bus conversion, all the elements are designed to create a fantastic mobile cigar lounge. The mock-up shows seating space, the RV bathroom, the area for the custom humidor, and the locations of various entertainment options.
This RV upgrade will also have several pocket doors, allowing the customer to partition the space. Some of the design elements change in the transition from paper to mock-up. Working around wheel wells, RV ceiling curves, and other existing structures shows the team how they need to modify the original design.
Take Time to Design Your RV Layout
Once the RV interior is fully mocked up, our professionals take time to sit and soak in every aspect of the proposed design. Quietly observing the space leads to subtle alterations and sparks ideas for new space-saving elements.
The experts at Leisure Coachworks prefer this hands-on approach to RV interior layouts. You can try the same techniques on your next RV DIY project.
