The last time we visited our 1972 MCI bus conversion, it was a brand-new project. The vehicle had already been gutted by the owner and some preliminary work was done.
Jon walked us through this empty space, showing us where components had been in its previous configuration. It was great to see the very beginning of such a big project.
Corrosion Outside
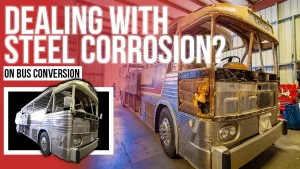
Today we’re going back to The Gypsy for our second installment. This bus has been around for a long time and it has some issues. The first thing Jon shows us is how the team is repairing the front of the bus.
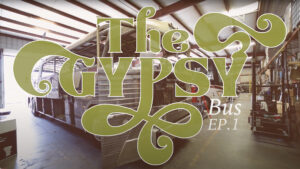
This area was the victim of steel corrosion and the whole front panel needed to be replaced. The rotted materials have been removed and templates put in place.
The templates are lined up for studs, have necessary access openings, and make sure the new front is perfectly placed and flush. The team checked the sides for damage to determine exactly how much of the front needed to be removed and mocked up.
Jon moves on to show us that the old tanks have been removed. Now we can see how much space is in those large, pass-through storage compartments under the coach. The crew can plan how this space will work with the layout of the bus conversion design.
Moving to the back of the bus, the team was faced with more corroded steel. It was removed and a new steel template was created and installed. This serves as a strong foundation for the rest of the build.
Designing Inside
After we tour the exterior, Jon takes us inside the bus to see the first stages of designing the new interior.
All that storage we saw outside will dictate how the inside is configured. So the first step in designing the layout is to mark off the exact dimensions of those storage bays. They will be home to the water tanks, so plumbing needs to be routed appropriately.
The team designs from the bottom up, making sure that the functional aspects of the bus conversion are planned before moving on to the design elements.
With this foundational information, Jon will talk with the customer and find out what they need in their converted bus. Depending on their RV lifestyle, some of the holes cut in the roof for the previous configuration might be reused. Some may have to be patched and new holes created.
This is a big MCI bus. 33 feet of interior space gives the customer and the team a lot of options for choosing components and creating the most efficient, feature-packed design.
At this point in the build, the only element that has been decided is the placement of the bed and side tables. Everything else has yet to be determined. This is a really exciting time in a project. The exterior damage is being repaired and the interior design is just beginning.
Be sure to follow this MCI bus conversion. Follow Leisure Coachworks on Facebook and Instagram and subscribe to our YouTube Channel to get all the latest updates as the team transforms The Gypsy.
If this bus conversion is inspiring you to start a project or renovate your RV, contact us at Leisure Coachworks. Our skilled team loves bringing your vision to life and creating the perfect RV for your travels.


