RV Roof Maintenance Guide: How to Clean, Seal, and Repair an RV Roof
RV roof maintenance is key to keeping your home on wheels in top shape. Just like you need to care for its engine and electrical system, you also need to focus on your rig’s exterior to prevent UV damage, leaks, and weather-related issues.
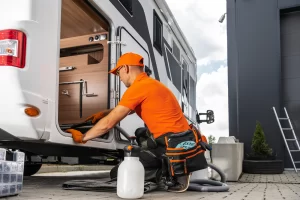
You can avoid costly repairs and damages that put a snag in your RV travel adventures by routinely inspecting, cleaning, and sealing your roof. Knowing the signs you need professional RV repair services can also save you a lot of money — and keep your investment in peak condition.
In this guide, we’ll explore the top tips for RV roof maintenance for beginners, including how to perform a routine inspection, cleaning suggestions, and an overview of sealing your RV roof.
How Often You Should Inspect Your RV Roof
It’s best to check your RV’s roof every six months. Taking a look twice a year is the standard recommendation, but you’ll also want to look any time your rig goes through a severe weather incident, like a hail storm, extreme winds, or heavy rain.
Even if you don’t travel that often, you should still perform routine RV roof inspections at least twice a year.
RV Roof Inspection Checklist
- Know your roof type. The most common types of RV roof materials are ethylene propylene diene monomer (EPDM), thermoplastic polyolefin (TPO), polyvinyl chloride (PVC), fiberglass, aluminum alloy, and galvanized sheet metal. There is no right or wrong type, but each one has its own strengths and weaknesses. An RV service company can help you identify your roof type if you don’t know it and offer personalized care tips.
- Wash your roof. It’s best to inspect a clean roof as dirt and grime could obscure minor damages that need to be repaired.
- Look for signs of damage. Scan your roof for cracks, tears, holes, dents or other signs of damage. If your roof isn’t walkable, then use a telescoping ladder. You can also bring your RV into a service center for a comprehensive inspection. The team at Leisure Coachworks is always available to help in Fontana, CA.
- Check the integrity of the roof seams and seal. RV roof seals and seams can be impacted by severe weather, and they can wear down over time. Make sure that the roof sealant is free of cracks, holes, or tears. You should also inspect the edges of the roof to see if there is any damage around the moldings.
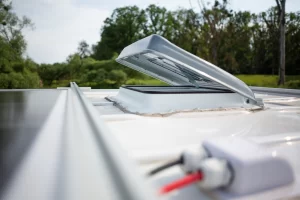
- Check any vents or appliances on the roof. From AC vents to roof rails, give your RV’s roof a thorough check to make sure that everything looks clean, damage-free, and secure. If you notice any concerning signs, head to an RV repair shop right away.
How to Clean an RV Roof
Cleaning an RV roof is a pretty straightforward process. You’ll need to sweep, rinse, clean, and rinse again. The real success lies in choosing the best RV roof cleaning solution. There are a ton of products to choose from, and you should make sure the one you buy is designed for the type of RV roof you have.
A pressure washer is a good idea when it comes to thoroughly removing dirt and keeping your roof clean. It’s best to clean your RV roof every three months to prevent buildup and the growth of mold or mildew.
While you don’t need to perform an inspection every time you clean your roof, it doesn’t hurt to take a look while you’re up there! If you spot any cracks, tears, or other damages, you can apply a sealant ASAP or visit an RV repair and maintenance center to get it fixed right away.
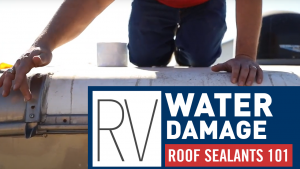
How to Seal an RV Roof
RV roof sealant can be applied as needed to fill cracks, holes, and other minor damages. But if your entire roof needs to be redone, you’ll need an expert to handle the job and replace the entire roof membrane.
When it comes to applying sealant to an RV roof, make sure you choose a product designed for your roof type. Every product also has its own individual instructions, so check the manufacturer’s guide before working on your vehicle.
When you’ve got the right product and are ready to make touch-ups, here are some general guidelines:
- Make sure the RV roof is clean and free of dirt and debris.
- Remove the old sealant with a putty knife or razor.
- Apply the sealant to any gaps or cracks, as well as fasteners and seams.
- Wait for it to dry (usually 24-72 hours).
It’s always important to have moderate to major signs of damage addressed by a professional.
Contact Leisure Coachworks in Fontana, CA, at (909) 428-6775 to connect with a member of our service team.