Roof leaks in RVs can be a common and frustrating issue for many owners, leading to potential water damage and costly repairs if left unaddressed. Understanding the causes of these leaks, recognizing the signs, and knowing how to prevent and fix them are essential aspects of RV roof maintenance. This article will provide valuable insights into preventing, identifying, and addressing roof leaks in your RV, offering practical tips for both DIY enthusiasts and when to seek professional help.
Finding a Rooftop Leak
It’s been said many times: water is going to go wherever water wants to go. This is how floods and other natural disasters happen. There are no rules when it comes to leaks––in a house, in a business, in a basement, or in an RV. If a leak forms in the roof of your motorhome, regardless of the size (whether it’s a Class A, B, C, or trailer), water can drip into your internal unit, or it can even travel internally within the fiberglass material, sloshing from one side of the roof to another.
When searching for a leak on the roof of an RV, there are several techniques that can be employed by professionals to effectively locate and address the issue. One common method is to visually inspect the roof for any signs of damage or wear, such as cracked sealant or missing shingles, which could indicate a potential leak source.
Another popular method is using a water hose to simulate rain while spraying different areas of the roof can help pinpoint the exact location of the leak. Thermal imaging technology can also be utilized to detect temperature variations on the roof surface caused by water infiltration.
However, the most effective method of identification is having a dedicated RV repair team perform routine maintenance checks.
The professionals know where to look to find rooftop leaks, and when found, treat the problem by re-sealing vulnerable areas with high-quality sealants to prevent further leaks from occurring.
Types of Appliances Found on the Roof of RVs
There are plenty of appliance types to be found on the roof of an RV––each one of them serving a specific purpose to enhance the overall camping experience. One such appliance is the air conditioning unit, which (as you can imagine) is essential for maintaining a comfortable and cool temperature inside the vehicle during hot summer days.
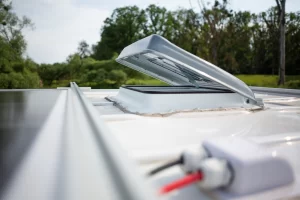
Another common rooftop appliance on some RVs is the solar panel system, which collects solar energy to power electrical devices and reduces reliance on traditional fuel sources. Many RVs also feature antennas for TV reception or satellite communication systems for staying connected while on the road, as well as refrigerator ducts to keep items cool in your interior fridge. On certain models, even roof vents and skylights can be found up there.
In all, these various rooftop features and appliances contribute to the functionality and convenience of your ride, making them well-equipped for extended travel and outdoor adventures. But they can also contribute to leaks if not maintained or installed properly. Always keep this in mind when shopping for new RVs, or when changing up the look and feel of your existing ride.
What to Do When You Discover a Roof Leak?
So, you’re cruising along in your RV, minding your own business, and suddenly you begin to hear an annoying drip, drip, drip sound. You pull over only to discover that a roof leak has decided to crash your road trip. Don’t panic! There are some temporary DIY fixes you can perform so that you can continue on with confidence until you can schedule a repair job.

First, carefully inspect the roof to identify the exact location of the leak so you can address it effectively. Then, reach for a temporary patch like RV roof tape or sealant to stop the leak until you can make a more permanent repair––always keep temporary sealants and tape on hand with you at all times.
After you’ve provided durable patching for the leak, be sure to assess the extent of the damage to determine if any repairs or replacements are needed to prevent future leaks. Again, this step is only a temporary solution. If you’ve found a leak, you’ll ultimately want to take your RV in for service to have the hole repaired by a dedicated professional.
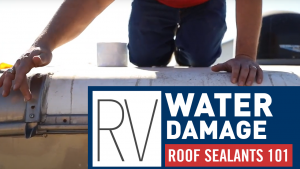
For more in-depth techniques, read about the importance of RV roof sealants and preventing water damage here.
A ROOFTOP RV LEAK BREAKDOWN
Signs and Symptoms of a Roof Leak in Your RV
- Water Stains on Ceiling or Walls
Visible water stains on the ceiling or walls of your RV indicate that water is seeping through the roof. - Damp or Musty Odors Inside the RV
A damp or musty smell inside the RV can be a sign of water intrusion, even if there are no visible leaks. - Visible Exterior Damage on the Roof
Check the roof of your RV for any visible signs of damage like cracks, tears, or missing sealant that may be allowing water to enter.
Common Causes of Roof Leaks in Your RV
- Age and Wear of Roof Materials
Roof materials in an RV can deteriorate over time due to exposure to the elements, leading to cracks and leaks. - Poor Installation
If the roof of your RV was not installed properly, it can result in gaps or weak spots that may cause leaks. - Sealant Deterioration
The sealant used to protect seams and penetrations on the roof can degrade over time, allowing water to seep through and cause leaks.
Regular Maintenance Tips to Prevent Roof Leaks
- Inspecting the Roof Regularly
Make it a habit to inspect your RV’s roof for any signs of damage or wear, such as cracks, bubbles, or missing sealant. - Clearing Debris and Keeping Gutters Clean
Remove any debris like leaves or branches from the roof regularly and ensure that the gutters are clear to prevent water from pooling and causing leaks. - Applying Roof Sealant as Needed
Check the condition of the roof sealant and reapply it as necessary to maintain a watertight seal and prevent leaks. - Using RV Roof Sealant
Think of RV roof sealant as your leak’s worst enemy. This sticky superhero can patch up those pesky holes and cracks in your RV roof, keeping the rain where it belongs––outside. Grab a tube of roof sealant, read and follow the instructions, and apply. - Replacing Damaged Roofing Materials
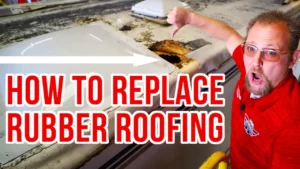
Sometimes, the leak is playing hardball and won’t surrender to sealant alone. If you spot damaged roofing materials like cracked seals or missing shingles, it’s time to roll up your sleeves and get your hands dirty. Gather your tools, channel your inner handyman, and replace those troublemakers. Remember, YouTube tutorials are helpful in times like these until you can get your RV to a professional.
When to Seek Professional Help for Roof Leak Repairs
Unfortunately, not all leaks can be eliminated by a few DIY fixes. If your roof leak is giving you a run for your money, it’s probably time to call in the professionals. Signs that you need professional help include leaks that won’t quit, and water damage that continues to spread––either gradually or rapidly.
Don’t be afraid to wave the white flag and let the experts work their magic. The skilled RV repair and maintenance technicians at Leisure Coachworks in Fontana, California, are available to help with rooftop leaks, as well as other RV repairs. Contact a member of the Service or Parts departments to see how we can help. Your RV will thank you.
Staying proactive in maintaining your RV’s roof integrity is key to preventing and addressing potential leaks. By following the tips and steps outlined in this article, you can better protect your RV from water damage and enjoy worry-free travel. Remember, early detection and timely repairs can save you both time and money in the long run.


