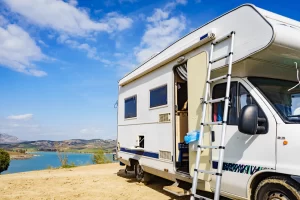
How to Deep Clean Your RV Interior for Spring
Your RV has been sitting through another California rainy season, and let’s face it—it’s probably looking a little sad right now. Those winter storms might be behind us, but their effects could be lurking in corners you haven’t checked yet. And with camping season just around the corner, now’s the time to wake your RV from its winter slumber.
Here’s something that might surprise you: RV owners spend an average of $5,000 to $18,000 on repairs caused by undetected moisture damage. That’s not a typo. And here’s the kicker–- most of these repairs could have been prevented with proper spring cleaning and inspection.
We’re going to walk you through a systematic approach to spring cleaning your RV’s interior. From detecting hidden moisture to organizing for the season ahead, you’ll learn professional-grade techniques that go beyond the basics.
Spring Pre-Cleaning Assessment
Before diving into the deep clean, there are a few critical factors that can make or break your spring cleaning success. These preparation steps might seem basic, but they’re often overlooked—and that’s where most RV owners run into trouble.
Here’s what you need to handle before starting:
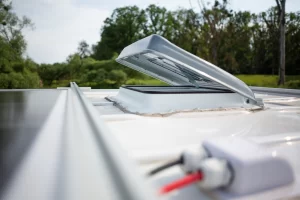
- Carry out a thorough water damage inspection with a flashlight, paying special attention to ceiling corners for brown stains or bubbled surfaces that signal potential issues.
- Perform a top-down inspection starting with ceiling panels—press gently to check for soft spots, particularly around vents, AC units, and slide-out joints.
- Document trouble spots by checking walls near windows and seams—mark soft spots or bubbling wallpaper with painter’s tape and take photos for reference.
- Establish proper ventilation by opening windows and running roof vent fans to prevent cleaning chemical buildup in your confined space.
- Gather RV-specific cleaning supplies including microfiber cloths, appropriate cleaners (avoid harsh household products), a vacuum with attachments, and a sturdy step ladder for safe access to high spots.
Start With Decluttering and Organizing
Before breaking out the cleaning supplies, let’s tackle the biggest challenge in your RV—the stuff that’s accumulated over winter. Your RV might feel like it’s shrinking under the weight of seasonal items and unused gear, but there’s a method to reclaim your space.
Start with a cabinet-by-cabinet cleanout, using the three-pile system: “keep for spring/summer,” “store until winter,” and “donate/dispose.” Those snow chains and heavy jackets? They’re just taking up valuable space you could use for warm-weather gear.
Be ruthless with your sorting—if you haven’t used something recently, it probably doesn’t deserve prime real estate in your limited storage areas. Transform those awkward corners and vertical spaces with hooks, magnetic strips, and clear containers for practical, visible storage that makes sense for the season ahead.
Surface Basics
Before diving into deep cleaning specific areas, let’s tackle the surfaces that set the tone for your entire RV interior. Winter storage leaves behind telltale signs—from sneaky cobwebs in corners to a stubborn layer of dust on every surface. These initial cleaning steps create the foundation for all your deeper cleaning tasks to follow.
Begin with a systematic approach to those often-overlooked spots: cobwebs hiding in corners and behind curtains, dust-covered vents and return grilles that affect your air quality, and windows that tell the tale of winter weather.
Use RV-specific cleaners for different surfaces—ammonia-free solutions for windows and appropriate cleaners for vinyl or wood-paneled walls. Work methodically in sections, paying special attention to those stubborn marks and stains that have accumulated over the winter months.
Remember, proper cleaning now prevents bigger issues later.
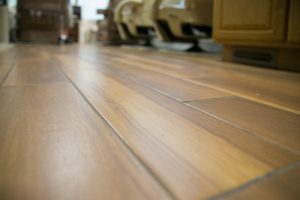
Reviving Your RV’s Floors
Winter takes a particularly harsh toll on your RV’s flooring, leaving behind tracked-in debris, salt residue, and hidden dirt in every corner. Each flooring type—from vinyl to carpet—needs its own specific cleaning approach to restore its appearance and protect it for the spring season ahead.
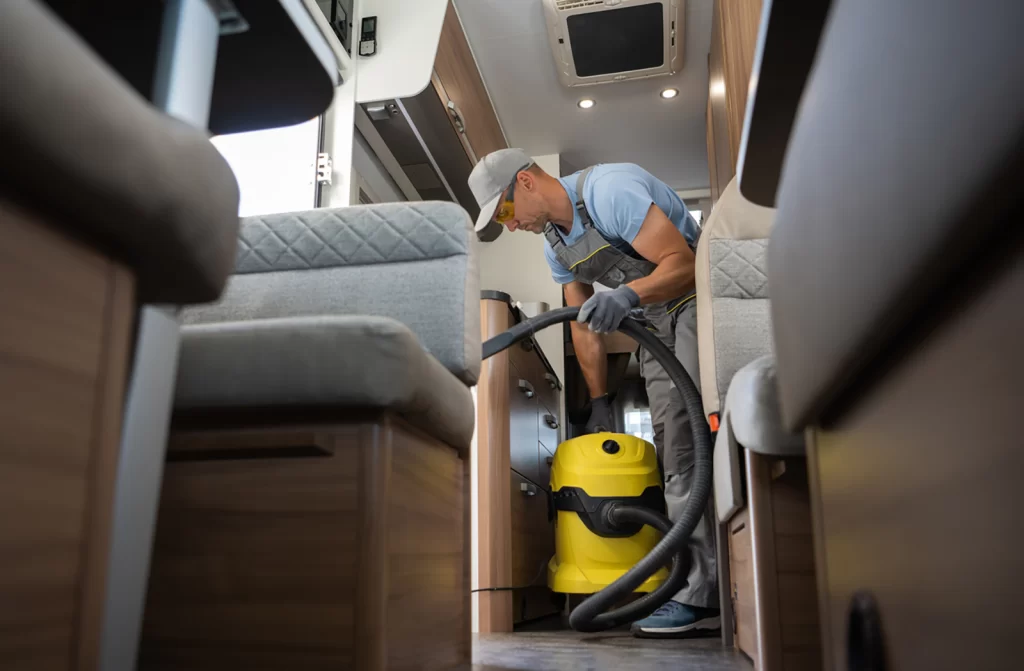
Start with a thorough vacuum of all surfaces, then move to targeted cleaning methods. Remember: less water is more when cleaning RV floors. Use RV-specific cleaning solutions that won’t leave residue, and consider dry cleaning methods for carpeted areas before any wet cleaning.
Once clean, apply appropriate protectants in thin, even coats to create a barrier against future stains and make subsequent cleanings easier. Work systematically toward your exit—the last thing you want is to clean yourself into a corner!
Cleaning Your RV’s Living Spaces
Your RV’s living space is where you spend most of your time, and after a long winter, it needs more than just a quick vacuum. From upholstery to window treatments, every surface has been quietly collecting dust, dirt, and maybe even moisture. A thorough revival of these areas will transform your RV from a stuffy winter hideaway into a fresh, welcoming space for your spring adventures.
Start with your upholstery, giving each surface its proper cleaning treatment—microfiber, vinyl, and fabric all need different approaches. Pull out every cushion to tackle those hidden spaces underneath, and don’t forget about your window treatments that have been filtering dust all winter.
While you’re at it, give your climate control system some attention by cleaning vent covers and ductwork. These often-overlooked areas make a huge difference in both air quality and overall comfort during your upcoming trips.
Transforming Your RV’s Kitchen and Bathroom Spaces
Your RV’s kitchen and bathroom see the most daily use, which means they need the most thorough attention during spring cleaning. These spaces harbor hidden dirt, expired items, and potential moisture issues that can cause bigger problems if left unchecked. A proper deep clean here will make your upcoming adventures more enjoyable and prevent unwanted surprises on the road. Start by emptying every cabinet and checking expiration dates—those forgotten snacks from last summer need to go.
Give your hard-working RV appliances the attention they deserve, from steam-cleaning the microwave to deep-cleaning refrigerator shelves.
Don’t forget the often-overlooked ventilation systems; that range hood filter needs a good degreasing soak. In the bathroom, work from ceiling to floor, paying special attention to seals and caulk lines that protect against water damage. Remember, these spaces are where cleanliness matters most for both comfort and safety.
Tackling Hidden Moisture Issues
Even though California’s rainy season has passed, moisture could still be lurking in your RV’s hidden spaces. Those slightly damp cabinets and musty corners aren’t just spring humidity— they’re warning signs that demand attention.
Proper moisture management requires more than those small moisture absorbers from the dollar store; invest in a quality dehumidifier sized for your RV and position it centrally for maximum effectiveness. Check window seals and roof edges early in the morning when dew is present to spot potential leak points, and consider professional help for thorough moisture detection.
At Leisure Coachworks, our thermal imaging equipment can identify hidden moisture pockets that the naked eye can’t see, and our specialized treatments prevent future water intrusion.
Preventing moisture damage is always cheaper than repairing it.
Remember to run fans after cleaning, use silica gel packets in enclosed spaces, and maintain a regular inspection routine – because preventing moisture damage is always cheaper than repairing it.
Taking Your Cleaning to the Next Level
Once the basic cleaning is done, it’s time to tackle the sophisticated systems that keep your RV comfortable and healthy. While your RV’s HVAC system controls the temperature, it’s also your primary defense against moisture, mold, and poor air quality.
That fuzzy buildup behind your return air grilles contains more than just dust but also a collection of dirt, pollen, and debris from your previous adventures that require specialized cleaning solutions.
Indoor air quality in RVs often needs extra attention, starting with RV-specific AC filters and thorough vent cleaning. Maintain humidity levels between 30-50% using a properly positioned dehumidifier, and consider professional-grade sanitization methods like electrostatically charged sprays for better coverage in confined spaces.
Skip the household disinfectants—they can do more harm than good in your RV’s unique environment. Remember, proper ventilation is an absolute must for deeper and thorough cleaning.
Maintaining Quality and Results
You’ve put in the hard work cleaning your RV, but the job isn’t quite finished. A thorough quality check ensures nothing was missed and helps maintain your efforts throughout the camping season.
Start with a methodical walk-through, moving clockwise from your entry door, and checking every surface and corner. Test all systems—from fans and lights to appliances—and give your AC units a full 15-minute run to verify they’re working properly after cleaning.
You might also want to monitor your RV’s environment for the next 24 hours, keeping humidity levels between 30-50%, and document everything with photos and notes. Lastly, create a maintenance schedule with regular check-ups, weekly wipe-downs, monthly deep cleans, and quarterly inspections of those easily forgotten spots.
Remember, maintaining a clean RV is far easier than starting from scratch each spring. This attention to detail now will keep your RV fresh and ready for adventure all season long.
Let Leisure Coachworks Handle the Heavy Lifting
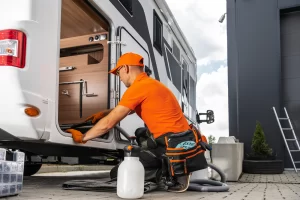
While DIY spring cleaning is important, some challenges require professional expertise. At Leisure Coachworks, we specialize in tackling those tough issues you might discover during your cleaning process—from suspicious water stains to stubborn odors that won’t go away.
Our experienced team uses commercial-grade equipment and specialized solutions not available to the public, ensuring your RV gets the deep clean it deserves.
Don’t let those dated cabinets or worn surfaces discourage you. Our restoration experts can breathe new life into tired interiors, often at a fraction of replacement costs.
We offer comprehensive services including professional deep cleaning, interior restoration, and customized maintenance programs tailored to your RV’s specific needs.
When you trust Leisure Coachworks with your RV, you’re not just getting a cleaning service —you’re investing in expert care that protects your RV’s value and extends its life. Contact us today to schedule a professional assessment and let us help keep your RV in prime condition for all your adventures ahead.
Protecting Your RV for Future Adventures
A well-maintained RV can last decades, while a neglected one might struggle to make it through a few seasons. The detailed inspections and preventive measures you’ve put in place will pay off during your summer travels, but remember—sometimes expert help makes all the difference.
Whether you’ve discovered a suspicious water stain or just want a professional once-over, Leisure Coachworks is here to help keep your RV in prime condition.
Take one final walk through your freshly cleaned RV, schedule your next maintenance check, and hit the road with confidence. After all, the best adventures are the ones where you can focus on the destination, and not worry about your RV’s condition.