RV Exterior Washing and Maintenance Guide for Spring
Winter’s grip has finally loosened, and your RV is calling you back to the open road. But before you hit the highway, that exterior needs serious attention after months of rain, dirt, and neglect.
California’s rainy season might be over, but its effects linger on your RV’s surfaces, seals, and systems. What looks like simple dirt might actually be the beginning of more serious issues that could derail your summer adventures if left unchecked.
This guide walks you through a professional-grade approach to exterior spring cleaning, from initial inspection to protective treatments. You’ll learn specialized techniques for different RV surfaces, discover solutions for winter-specific damage, and understand when certain tasks are best left to professionals. Let’s dive in!
RV Exterior Pre-Cleaning Inspection
Before you break out the soap and water, a thorough inspection of your RV’s exterior can reveal winter damage that needs attention. Here’s what you can do to find subtle signs of potential problems that are easier to address now than after they’ve worsened.
- Begin at the roof and work methodically downward, examining every seal and seam
- Check window seals by pressing gently along frames to identify spots that give too easily
- Inspect roof sealants around vents, antennas, and AC units for discoloration or cracking
- Pay special attention to slide-out seals which often show the first signs of wear
- Examine the undercarriage with a flashlight, looking for corrosion from road salt and moisture
Another important is to make sure you record problems for later with your phone. By documenting your findings, you can save thousands in potential repairs.
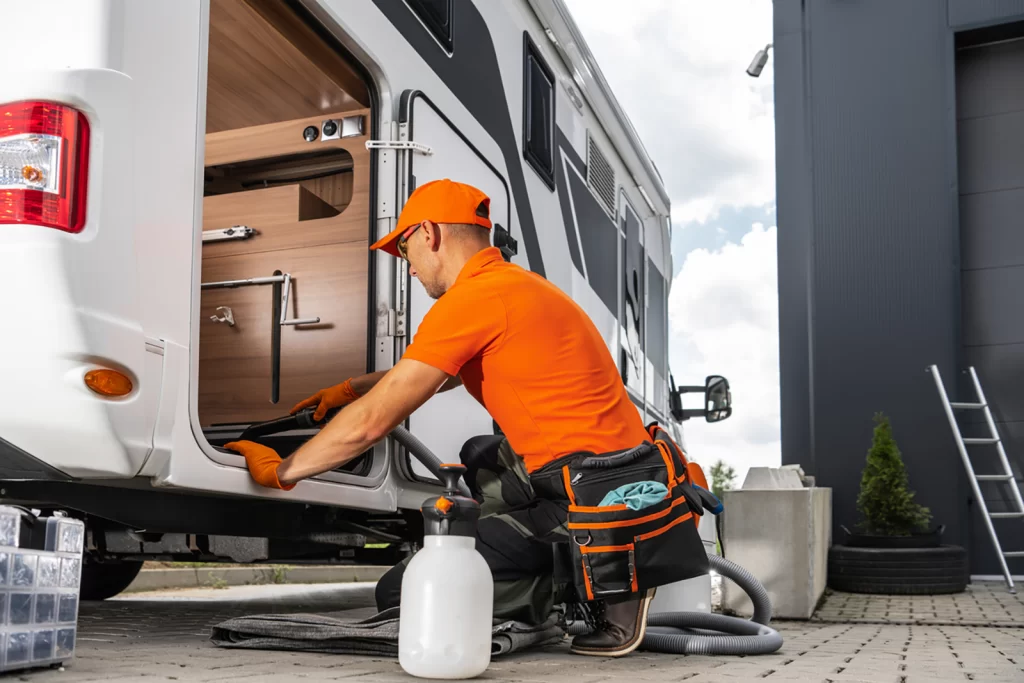
RV Cleaning Tools That Make a Difference
You wouldn’t try to change your oil with a butter knife, so why tackle your RV’s exterior with inadequate tools? Investing in the right equipment saves you time, prevents damage, and delivers professional results.
Make sure you consider these cleaning tools for your RV’s exterior:
- An extendable RV brush with soft bristles protects your RV’s finish while reaching high areas
- A collapsible bucket system enables the professional two-bucket washing method
- Extendable squeegees prevent water spots and streaks for a professional finish
- Microfiber drying towels absorb seven times their weight in water without scratching surfaces
- A sturdy ladder with stabilizers provides safe access to your RV’s roof
Cleaners That Won’t Damage
That dish soap in your kitchen? Leave it there. Your RV’s exterior needs cleaning products specifically formulated for its unique surfaces.
- Choose RV-specific cleaners formulated for fiberglass, aluminum, and vinyl surfaces
- Look for products with neutral pH (6-8) to protect coatings and prevent oxidation
- Avoid “wash and wax” combination products that typically underperform at both tasks
- Use dedicated cleaning solutions followed by separate protective treatments
Clearing Out Winter Clutter
Those exterior compartments have become catch-all spaces over the winter, haven’t they? It’s time to face what’s lurking behind those doors. Follow these steps to reclaim your RV’s exterior storage space:
- Empty everything: Pull all items out of your exterior compartments and lay them where you can see everything clearly.
- Sort ruthlessly and create three distinct piles:
- “Keep for spring/summer” (essential items)
- “Store until winter” (seasonal items like snow chains)
- “Donate/dispose” (items you no longer need)
- Prioritize by frequency: Place items you use at every campsite in easily accessible compartments, while “just in case” items can go in harder-to-reach spaces.
- Pack strategically: Remember that every pound removed improves fuel efficiency and reduces wear on your RV’s systems.
Remember – every pound you remove improves your fuel efficiency and reduces wear on your RV’s systems.
Deep Cleaning Storage Areas
Now that you’ve emptied those compartments, you’re probably staring at months of accumulated dirt, cobwebs, and mystery stains. This is your opportunity to start fresh. Follow this cleaning sequence for your storage areas:
- Vacuum thoroughly: Use a crevice attachment to remove debris, cobwebs, and dirt from corners and edges.
- Wipe down surfaces: Clean all surfaces with appropriate cleaners for your compartment materials (most can handle mild all-purpose cleaner).
- Inspect for water damage: Check for water stains or warped areas that indicate potential seal problems.
- Document issues: Mark concerning spots with painter’s tape and add them to your repair list.
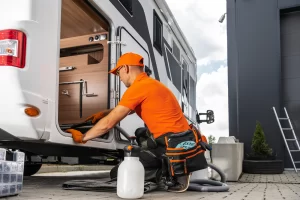
RV Exterior Cleaning Process
There’s a reason professional detailers always start at the top – gravity. Working from the roof down ensures that dirt and cleaning solution flow downward onto areas you haven’t cleaned yet, rather than ruining your freshly cleaned surfaces.
Your RV roof has been collecting everything from tree sap to bird droppings all winter, and all of that needs to come off before it damages your roof membrane. Here’s a safe, effective cleaning process for your RV’s exterior:
- Set up safely: Use a proper RV ladder or scaffold system with three points of contact at all times.
- Start with the roof: Begin with a gentle rinse to remove loose debris.
- Clean in sections: Apply roof-specific cleaner in small areas, working with straight, overlapping strokes.
- Rinse thoroughly: Never let the cleaner dry on surfaces.
- Work downward: Clean sides using horizontal strokes that follow your RV’s natural lines.
- Pre-treat problem areas: Give special attention to the front cap with bug remover before regular washing.
It’s important that you work your way methodically down the sides. Those swirling motions might feel satisfying, but they’re creating micro-scratches that will dull your finish over time.
Alternatively, you might also want to consider the two-bucket method, where you one bucket contains your soap solution, while the second holds clean rinse water.
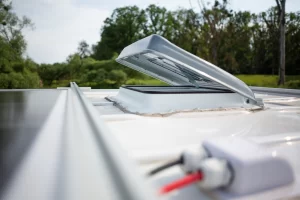
Roof Care Essentials
Your RV’s roof takes the brunt of nature’s fury year-round. Those rubber or TPO membranes might look tough, but they’re surprisingly vulnerable to UV damage, tree sap, and environmental contaminants.
Follow these steps more closely to address the heavy winter buildup and prepare your RV’s roof for the upcoming season.
- Clean on an overcast day to prevent cleaning solutions from drying too quickly and reducing slipping hazards
- Work methodically from front to back in overlapping sections for thorough coverage
- Use cleaners specifically formulated for your roof type (EPDM, TPO, or fiberglass)
- Apply with soft-bristle brushes using gentle, straight strokes to avoid membrane damage
- Pay extra attention to seams around vents, AC units, and antennas where leaks often begin
- Inspect sealants for cracking, peeling, or separation while cleaning
- Apply a UV protectant after cleaning to create a protective barrier against environmental damage
- Use thin, even coats of protectant according to manufacturer specifications
Bringing Awnings Back to Life
That awning that provided shade all last summer has been rolled up tight all winter, creating the perfect environment for mold and mildew. Follow these spring cleaning tips for your RV’s awnings to restore it to its former glory.
- Fully extend your awning to access all surfaces and assess any mold, mildew, or stains
- Begin with a gentle rinse using low pressure to remove loose dirt and debris
- Apply an awning-specific cleaner designed to protect fabric while removing contaminants
- Use a soft-bristle brush to work the solution in, focusing on the underside where mold thrives
- For vinyl awnings only, tackle stubborn stains with a diluted bleach solution (never use on acrylic)
- Inspect and lubricate mechanical components with silicone spray while extended
- Allow the awning to dry completely before retracting to prevent future mold growth
- Consider applying a UV protectant like 303 Aerospace Protectant to restore water repellency
RV Window and Door Maintenance
Your RV’s windows and doors aren’t just about the views – they’re critical to your rig’s weather resistance and security.
Proper maintenance makes sure your RV stays weather-resistant and secure during your upcoming adventures. As spring approaches, here’s how you can give your RV’s windows and doors special attention:
- Clean glass surfaces with ammonia-free, RV-specific cleaners to protect special coatings and rubber seals
- Work methodically from top to bottom using overlapping horizontal strokes with microfiber cloths
- Treat stubborn water spots with a 50/50 mixture of white vinegar and distilled water
- Use a clay bar for safely removing stubborn mineral deposits without scratching surfaces
- Condition rubber seals with silicone-based protectants to prevent cracking after winter compression
- Apply seal conditioners with a foam brush for even coverage, wiping away excess from surrounding areas
- Clean window tracks and door jambs with detailing brushes and compressed air to remove debris
- Lubricate sliding components with dry graphite lubricant that won’t attract dust like oil-based products
When to Seek Expert Help
You’re dedicated to maintaining your RV, but some tasks are best left to professionals with specialized equipment and expertise. Recognizing when to call in the pros isn’t admitting defeat – it’s smart ownership that can save you money and headaches in the long run.
At Leisure Coachworks, we understand that your RV is more than just a vehicle – it’s your ticket to adventure and family memories. Our exterior cleaning services go beyond what’s possible with home equipment, using commercial-grade products and techniques developed specifically for RV care.
Whether you need a complete exterior restoration or just want the peace of mind that comes with professional inspection, our team is here to help keep your adventures rolling smoothly.
Call us at 909-428-6775 for a complimentary service evaluation, or visit our website for all your spring RV preparation needs.