Replacing Your Entire Awning: When Repairs Aren’t Possible, Replacing Becomes Essential
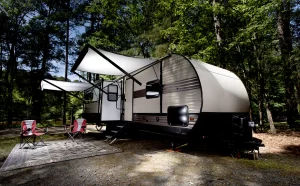
One of the first steps to setting up your perfect campsite is spreading out your awning. It offers just the right amount of shade to give you a place to work, relax, and cook. But what happens when your RV awning isn’t working? Your first step may be to troubleshoot a non-working awning to see what’s happening and try to get a fix in place.
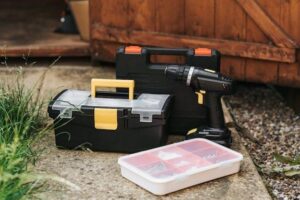
Most of the time, a handy person with the right tools can repair an awning to some degree, depending on the project. But in some cases, such as the following example of a recent customer, repairs are not always possible.
Replacing an RV awning is comparatively more complex and requires significant hands-on knowledge and careful precision. If you are a DIYer trying to save some money, be warned: This is a tough project to get right. Contact the the experts at Leisure Coachworks if this is beyond your comfort zone.
Why Replacing an RV Awning Is Necessary Sometimes
Many times, RV awning repairs focus on concerns like motor failure, mechanical failures, or power disruptions. A client’s recent experience paints the picture of when RV awning repairs turn into RV awning replacements.
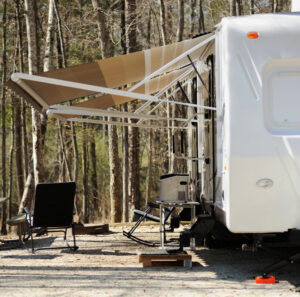
A recent case was for a 2017 Thor Chateau Class C RV awning in non-working condition. The awning was getting power to the motor, but it simply would not retract back to its completely closed position. When activated, the arm seemed to try, moving a bit towards the closed position, but then sprung out.
Once disassembled, it was found that one of the three main gears had a few missing and broken teeth. That’s exactly what was causing the problem. With that section of the gearing lost, its loss of connection to the other two bigger gears would cause the arm to jut out.
The RV featured a Lippert Solera, one of the most common RV awning models used today. Its natural state is to be in a fully open position. When the big gears that connect the motor to the rolling tube are not in place, the awning arms automatically will spring open to their full extension. Imagine that on the roadway. In this case, all we had to do was replace the broken gear. We ordered the Solera Power Awning Drive Head Gear Kit for about $75.
Here’s where things went a bit off track. The awning arms were strapped down in the fully retracted position. The owner decided to fill up the gas tank during that wait, though, and en route, one of the straps came undone, causing the arms to instantly fully extend, hitting a telephone pole and causing even more damage to the arms.
The good news is that no one was hurt, and the fabric was salvageable. The bad news is that both arms were damaged beyond repair. The replacement parts that were needed was found in the Solera Standard 12V Universal RV Awning Arms & Hardware Kit ($750). This kit included the arms, mounting brackets, roller caps, and pins.
How to Replace the Awning on an RV
Again, I would like to issue a warning: replacing the RV awning isn’t simplistic, and this is a job best left to the pros. However, here’s what we did to get it back to working condition.
Remove the Arms
The first step is to remove the existing arms and all hardware. Ensure the entire area is clean and smooth with no damage. In our case, there was some damage to the screw holes. That’s because the arms were ripped out in the accident. To fix this, we took measurements of the screw holes and measurements of the old arms.
Assess the Roll Tube
In some cases, the roll tube, where the awning rolls into, could also need replacement, especially if it’s damaged or deformed. In our case, the roll tube was still in good condition, so nothing had to be done there.
Order the Replacements
It’s critical to get the right product for your RV, of course. A quick look on online will show you dozens of options. Precision matters. Measure the old arms accurately to ensure you get the same functionality.
Then, compare kit options. You’ll want to choose a brand that’s well-rated and invest in a kit when possible. The kit makes it easier simply because all of the components are new and easy to fit together. Our kit included new roll tube caps and the shaft pins as well.
Repair the Damage
While waiting for the order to ship, we go to work on the RV’s body. This took temporarily sealing off the holes with RV sealant tape to prevent any further damage. We also inspected the electrical components and made upgrades as needed.
That included updating the wiring for the arm and lighting. We secured these on the arm motor side. We then got to work on the damaged screw holes. Noting the importance of ensuring the exact alignment and strength necessary to hold up the new awning arms.
Patching the Holes
Several methods exist for fixing these holes, but some are more durable than others. Avoid epoxy resins like JB Weld, as they are prone to cracking. Instead, use a fiberglass filler product such as U-Pol Fibral Sandable Glass Fiber Repair Paste Filler, which is tough, durable, and waterproof.
To apply, add the hardener as recommended by the manufacturer and mix until thoroughly blended. Press the mixture into the hole, ensuring it is fully filled and slightly overfilled. Allow it to harden completely before proceeding, as drying time may vary based on the hole size and filler type.
Once dried, sand the filler flush with the surface. Depending on your goals, you may choose to paint it, and sealing the area will help protect it for long-term durability.
Reinstallation of the Arms
Once the new arms arrived, the kit did provide some directions, and if you are going to do this project yourself, be sure you read and follow them.
In our case, the process began with proper alignment of the new awning by drilling arm pilot holes. I cannot stress enough the importance of measuring and then measuring a second time so you’re not drilling holes into the RV aimlessly. Very precise alignment ensures the proper fit.
If you’ve removed the old arms yourself, you’ll then follow the repeat process for installation. Typically, to install the new awning arm, you’ll need to:
- Attach the lower sidewall bracket as the first step.
- Then, snap the roller assembly onto the top of the new arm.
- Then, hold it in place by screwing it into the new holes you’ve created.
- Apply some silicone sealant to keep moisture out of the holes once they are locked into place.
- The travel lock located on the inner arm also needs to be released, folded out, and reattached to the sidewall.
In our case, we recapped the roll tube and then installed the roll tube with the new awning fabric in place. If you’re replacing the fabric, you’ll need to take a few extra steps, including ensuring proper fit and alignment, before putting it onto the roll tube.
Reset the RV Awning
Once the entire assembly is ready to go, you can test the new RV arm out to ensure it’s rotating freely. Make adjustments as needed to ensure smooth operation. “Good enough” really isn’t good enough.
Keep the Following in Mind
When replacing the arms on an RV awning, you’ll need to ensure you know what’s presently there. Though some kits are universal (or promise to be), they still will have limitations based on the RV size and class to verify before making a purchase.
Remember, too, that you’ll want to go back and properly clean and seal the repair you’ve made to ensure there is no risk of moisture penetration into your RV.
What We Recommend
Any type of exterior upgrades and repairs are tricky because small errors in this process can lead to malfunctioning awnings that ultimately make setting up camp challenging. When possible, let our team handle the work for you instead.
At Leisure Coachworks, we’ll help you figure out the best possible solution for any RV repair you need.